Introduction to Proxy402
Proxy402 is a service that allows you to monetize any content on the web. Using the X402 protocol, Proxy402 enables machine-native payments for any URL you provide, effectively placing a paywall in front of your content that can be paid using USDC on Base.
Create Your First Test URL
Let's create a monetized URL using the Bitcoin whitepaper as an example:
- Log in to Proxy402 with your Google account. From the dashboard, you can choose to monetize an existing URL or upload a file to monetize it.
- Add this URL:
https://raw.githubusercontent.com/ibz/bitcoin-whitepaper-markdown/refs/heads/master/bitcoin-whitepaper.md. (If you were monetizing a file, you would select your file for upload here instead of providing a URL.) - Set the price to 0.01 USDC. You can also specify
creditand set the number of accesses this payment provides - Toggle test mode ON (to use Base Sepolia testnet)
- Select GET as the HTTP method (for files, this is typically always GET).
- Click "Add URL" (or "Upload File" if applicable).
After submitting, you'll receive a shortened URL similar to https://proxy402.com/DDSYO8ch1S. This is your monetized link. Whenever someone accesses this URL, they'll need to pay 0.00001 USDC on the Base Sepolia testnet. After payment, Proxy402 makes a GET request to the original Bitcoin whitepaper URL and returns the content to the user.
If you set up a credit-based link, the first payment grants access and provides a way to use the remaining credits for future access (covered in the 'Accessing Monetized Content' guide).
Understanding the X402 Protocol Response
Open a monetized URL in your browser to see a nice paywall page for your content. Click here to view an example of the Bitcoin whitepaper with a 0.00001 USDC price tag.
The browser will display a user-friendly payment page that looks like this:
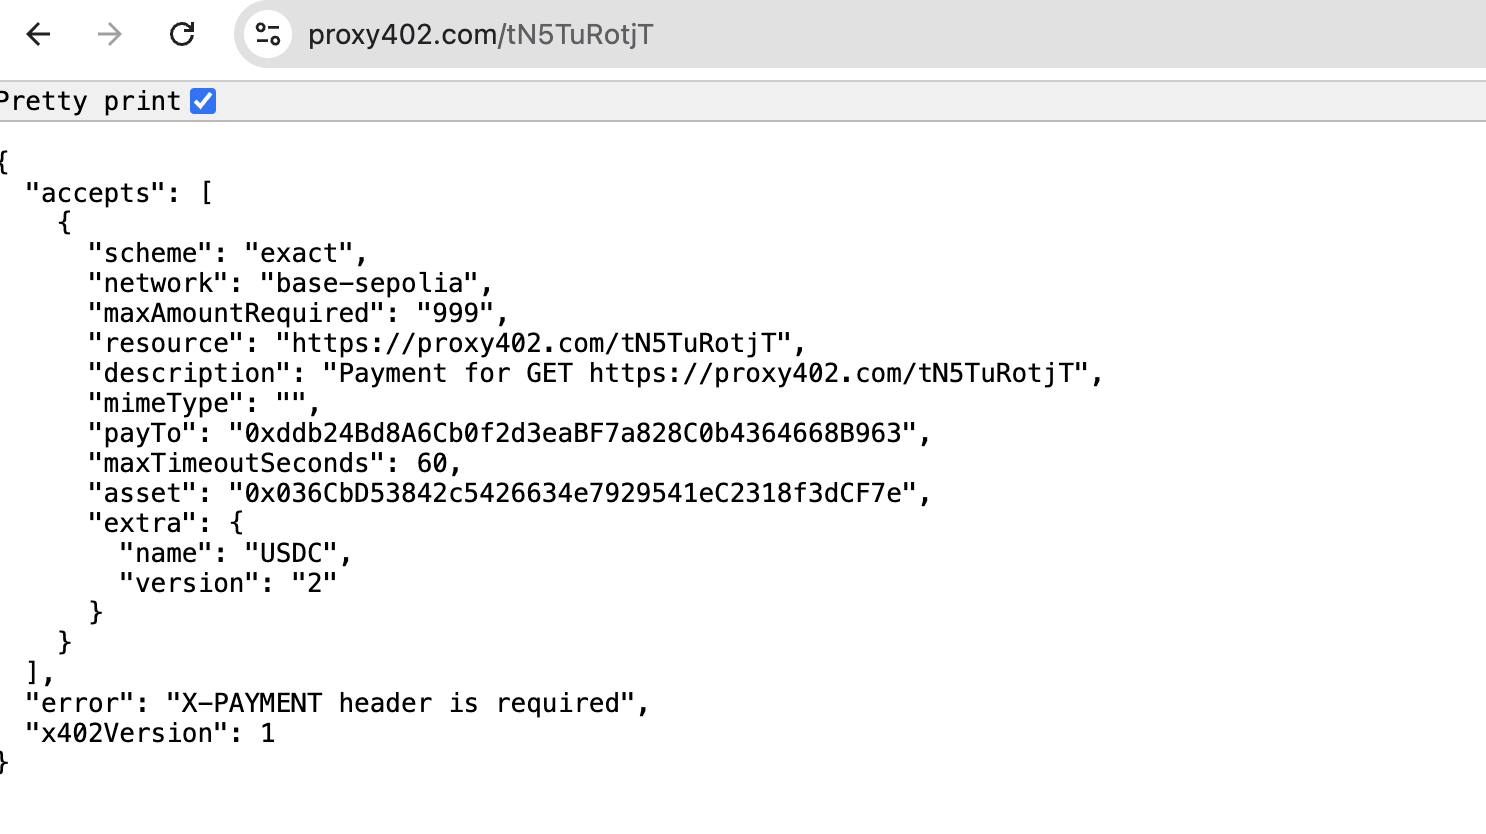
If you want to see the raw X402 protocol JSON response (useful for developers), you can use curl with the @ symbol:
curl https://proxy402.com/DDSYO8ch1S | jq
 {
  "accepts": [
    {
      "scheme": "exact",
      "network": "base",
      "maxAmountRequired": "10",
      "resource": "https://proxy402.com/DDSYO8ch1S",
      "description": "Payment for GET https://proxy402.com/DDSYO8ch1S",
      "mimeType": "",
      "payTo": "0xddb24Bd8A6Cb0f2d3eaBF7a828C0b4364668B963",
      "maxTimeoutSeconds": 60,
      "asset": "0x833589fCD6eDb6E08f4c7C32D4f71b54bdA02913",
      "extra": {
        "name": "USD Coin",
        "version": "2"
      }
    }
  ],
  "error": "X-PAYMENT header is required",
  "x402Version": 1
}
This will show you the exact JSON response containing all the payment details that an X402-compatible client needs to pay for access, including:
- The payment amount (0.00001 USDC)
- The payment destination (a Base address)
- Other technical details for the X402 protocol
Test Your URL Instantly
For immediate testing without any setup, visit proxy402.com/fetch. This web interface lets you:
- Test X402 requests with any URL
- Connect your wallet via WalletConnect (MetaMask, etc.)
- See formatted X402 responses and payment details
- Make payments directly in the browser
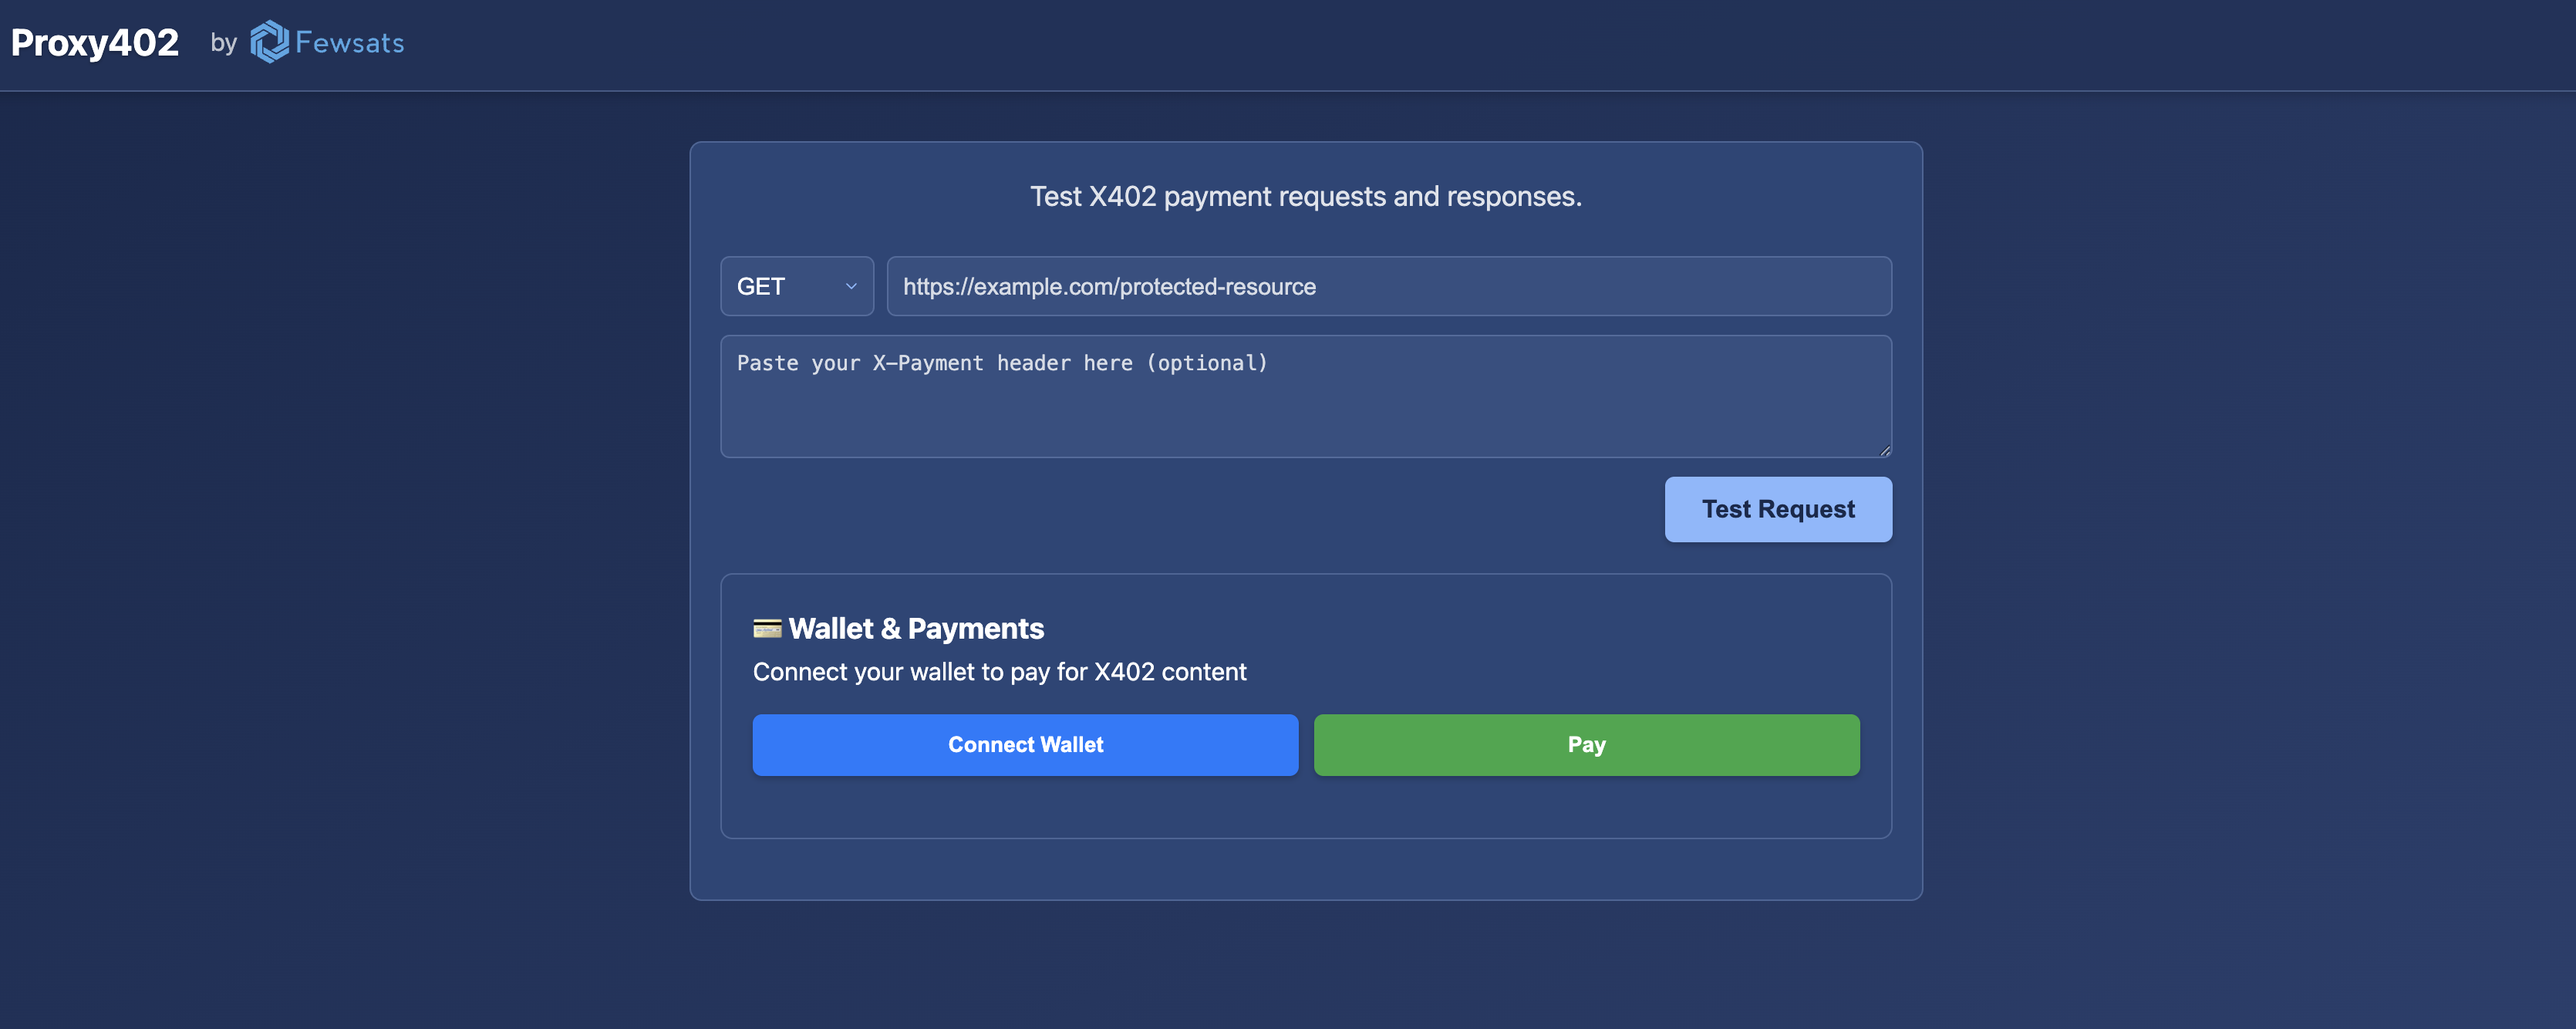
Simply paste your monetized URL, click "Test Request" to see the X402 response, then use "Connect Wallet" and "Pay" to complete the payment flow.
Now that you have a test URL, let's see how you can pay for it in the next section.
What's Next?
Continue with these guides to learn more about using Proxy402:
- Pay for Content - Learn how to use the client to pay for monetized URLs
- Direct Payments - Receive payments directly to your wallet
- Verify Requests - Ensure all requests to your server are properly paid
- About X402 Protocol - Dive deeper into how the X402 protocol works
For more information about the X402 protocol, you can also visit x402.org.