Paying for Monetized Content
In this section, we'll walk through paying for monetized content (URLs or files), understanding how to handle test versus production payments, and how to use access credits. We'll cover both the web-based debug tool and the CLI client.
Method 1: Web Interface (Recommended)
The fastest way to test and pay for X402 content is using the web interface at proxy402.com/fetch.
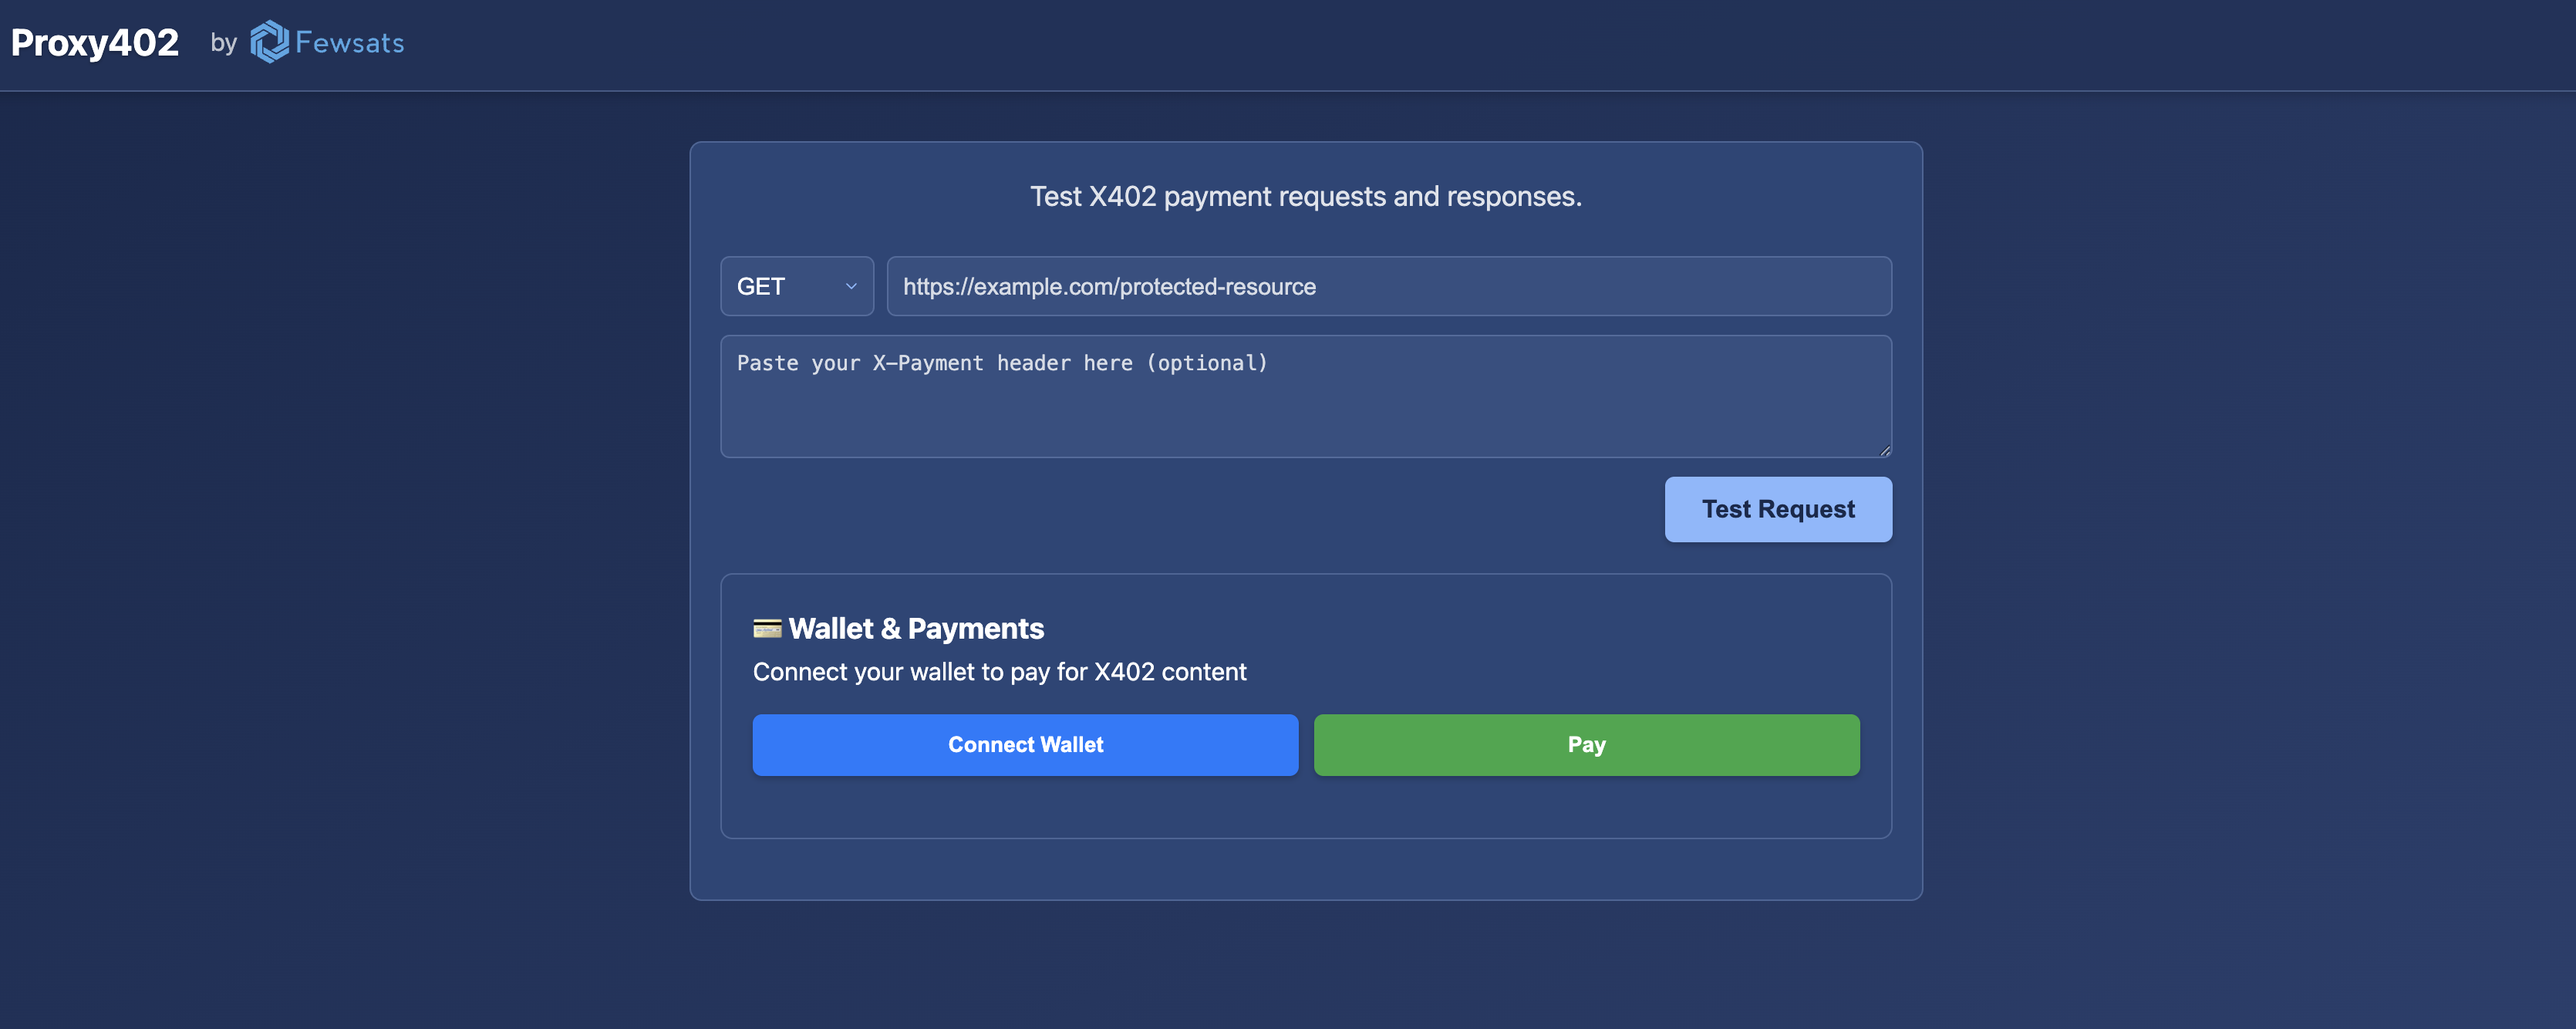
Testing X402 Responses
- Visit proxy402.com/fetch
- Paste your monetized URL (e.g.,
https://proxy402.com/OCVnX7cjmd) - Click "Test Request" to see the X402 response with payment details
- Copy the X-Payment header if you want to use it manually
Making Payments
- Click "Connect Wallet" to connect via WalletConnect (MetaMask, etc.)
- For test payments, get test funds from the Circle USDC Faucet (select "BASE USDC" for Base Sepolia)
- Click "Pay" to complete the payment using your connected wallet
- After payment, you'll see the response with headers including the
X-Paymentheader for future access
Using Purchased Credits
If your resource grants multiple access credits, use the X-Payment header from your successful payment:
- Paste the
X-Paymentheader value in the "Paste your X-Payment header here" field - Click "Test Request" to access the content using your credits
- Each use consumes one credit without requiring a new blockchain transaction
Method 2: CLI Client
For developers who prefer command-line tools or need to integrate payments programmatically:
Setting Up the Client
Let's start by cloning the Proxy402 repository and navigating to the client folder:
# Clone the repository
git clone https://github.com/Fewsats/proxy402.git

# Navigate to the client directory
cd proxy402/client
Now, let's create a configuration file:
# Copy the example environment file
cp .env.example .env
And install dependencies:
npm install
Creating a Wallet
You'll need a private key for a Base address to make payments. You can use an existing wallet or create a new one. If you don't have one, you can create it using Foundry:
-
Install Foundry by running:
curl -L https://foundry.paradigm.xyz | bash -
Close and reopen your terminal to make sure it's added to your PATH
-
Install the latest version of the binaries:
foundryup -
Create a new wallet:
cast wallet newThis will output something like:
Successfully created new keypair.
Address:     0x5a07A201454B1bfD832390De797FcAC71a0B3256
Private key: 0x383b73a7b5baf4d4deb9cd5e2689648ecc02646f77e82f4e51f3ff4334d4f083 -
Add the private key to your
proxy402/client/.envfile:PRIVATE_KEY="YOUR_PRIVATE_KEY_HERE"Replace
YOUR_PRIVATE_KEY_HEREwith the private key from the previous step (including the0xprefix).
If you'd prefer to use your own method to generate a wallet, that's fine too. Just make sure to add the private key to the
.envfile.For more details on installing Foundry, see the official documentation.
Making Your First Payment Attempt
With the client set up and your private key in the .env file, try accessing a monetized URL (e.g., one you created in the previous guide, or the demo https://proxy402.com/OCVnX7cjmd):
npm run client -- https://proxy402.com/OCVnX7cjmd
If your wallet is new and unfunded, you'll likely see an error message from the client indicating "Insufficient funds". This is expected.
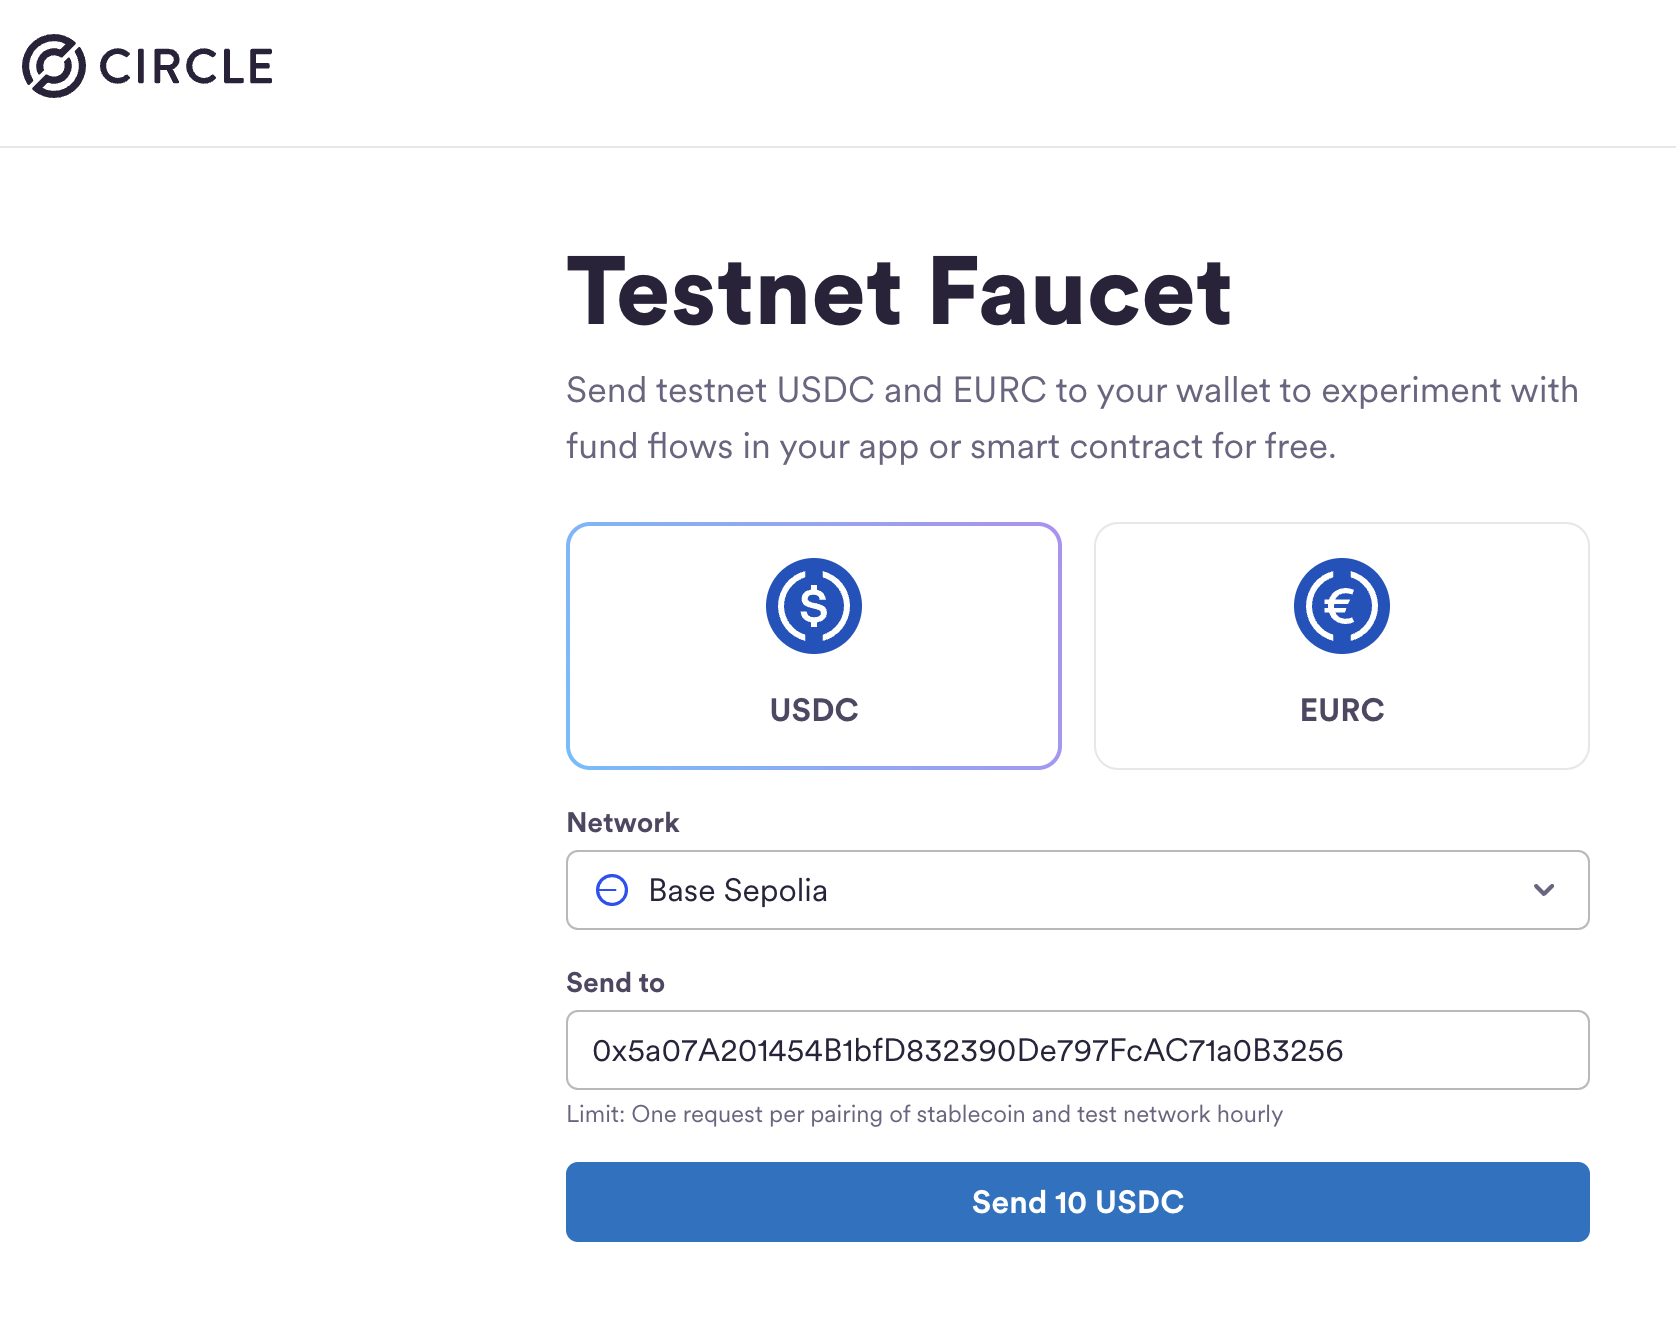
Adding Test Funds
To proceed with test payments (for resources in "test mode" on Proxy402), your wallet needs test USDC for the Base Sepolia network.
- Go to the Circle USDC Faucet
- IMPORTANT: Make sure to select "BASE USDC" as the network (for Base Sepolia).
- Enter your wallet address (the one that starts with
0xfrom thecast wallet newstep) and request funds.
Successful Payment and Accessing Content
Once your wallet has test funds, run the command again:
npm run client -- https://proxy402.com/OCVnX7cjmd
This time, the payment should succeed! Here's what to expect:
- For URL Resources: If the monetized link points to a URL (like the Bitcoin whitepaper example in markdown), the client will display the content of that URL directly in your terminal.
- For File Resources: If you're accessing a monetized file, the successful response from the client will be a JSON object like this:
To download the file, copy the entire
{
  "download_url": "https://...r2.cloudflarestorage.com/.../yourfile.pdf?X-Amz...",
  "filename": "bitcoin-paper.pdf"
}download_urland paste it into your web browser, or use a command-line tool likecurl "PASTED_DOWNLOAD_URL" -o bitcoin-paper.pdf.
Using Purchased Credits
When you successfully pay for a resource, the Proxy402 server always includes an X-Payment header in its HTTP response. If the resource you paid for grants multiple access credits, this X-Payment header value is the token you'll use to access your remaining credits.
After your first successful payment for a multi-credit item, look for the X-Payment header in the HTTP response. The proxy402/client might display this in its output, especially in verbose mode where full response headers are shown.
For example, the URL below provides 5 credits to access the bitcoin white paper in base sepolia.
npm run client -- https://proxy402.com/pT6bpt_zBz
...
Request Headers: {
  "Accept": "application/json, text/plain, */*",
  "User-Agent": "axios/1.9.0",
  "Accept-Encoding": "gzip, compress, deflate, br",
  "X-PAYMENT": "eyJ4NDAyVmVyc2lvbiI6MSwic2NoZW1lIjoiZXhhY3QiLCJuZXR3b3JrIjoiYmFzZS1zZXBvbGlhIiwicGF5bG9hZCI6eyJzaWduYXR1cmUiOiIweGQ4YzllMWI5NzE2ZGYwMWU3MDQyNGVkNjI1YzhjNTUwNzExNWZjM2MzNGNhYmY4ODk3ZTk3NWRlZjY4OTY1ODYxMzhhM2YzM2I0YTQ3OGVkYmY1NmQwMmM3YTcwYzdhYzdhOTU0MjU3MzU0OGZmZGFlNjgwMWNjY2QwYzI2ZTMyMWMiLCJhdXRob3JpemF0aW9uIjp7ImZyb20iOiIweDk2QmMwODdmNTQ1RDlBQ0I1QTIzMkFjNjIwNzE4MmE1OTE0MTBiOEEiLCJ0byI6IjB4ZGRiMjRCZDhBNkNiMGYyZDNlYUJGN2E4MjhDMGI0MzY0NjY4Qjk2MyIsInZhbHVlIjoiMTAwMDAiLCJ2YWxpZEFmdGVyIjoiMTc0NzMwNDc2NSIsInZhbGlkQmVmb3JlIjoiMTc0NzMwNDgzMCIsIm5vbmNlIjoiMHhkMjMzMDUxM2YyMGJlMDUzMWU1NjI1ZGMxMGY3NDU4NGEwNDY4Zjg3NzZlNzQxMzIxM2YxZmFiZmVjMzUyZmE2In19fQ==",
  "Access-Control-Expose-Headers": "X-PAYMENT-RESPONSE"
}
The X-Payment header, shown in the example above, contains the token that identifies your purchase. This token is used to access your purchased credits. To use a saved credit for subsequent access to the same resource, provide this token using the --payment-header flag with the client:
npm run client -- https://proxy402.com/pT6bpt_zBz --payment-header "YOUR_SAVED_X_PAYMENT_TOKEN_VALUE"
The client will send this token in the X-Payment request header.
If the token is valid and credits remain:
- You'll gain access to the resource.
- One credit will be consumed from your purchase without a new on-chain transaction.
If your token is invalid (e.g., all credits used or expired), the proxy402/client will typically attempt a new payment.
For more client command details, see the proxy402/client/README.md.
Making Production Payments (Mainnet)
When you want to pay for resources that are not in "test mode" (i.e., they require real payment on the Base mainnet):
- Ensure the wallet address associated with your
PRIVATE_KEYin the.envfile holds real USDC on the Base mainnet. - The same wallet address can be used for both Base Sepolia (testnet) and Base mainnet. You simply need to have the correct type of funds (test USDC or real USDC) for the resource you're trying to access.
- Run the client on mainnet with the
--networkflag set tobase-mainnet(orbase):The client requires you to specify the network; it does not automatically detect it from the server's L402 challenge.npm run client -- https://proxy402.com/DDSYO8ch1S --network base-mainnet
Checking Your Monetized Resources
If you created your own monetized URL or file, you can use the client to pay for it too:
npm run client -- https://proxy402.com/DDSYO8ch1S
After making a payment (or using a credit), go back to your Proxy402 dashboard and check your resource's statistics. You'll see that the "Attempts," "Payments," and potentially "Accesses" (if credits were used) counters have increased, and your earnings reflect any new payments.